
기능설명
개인 포폴용도로 만드는 쇼핑몰 개발중 이미지 업로드는 필수였습니다.
이미지를 업로드 하는것 뿐만 아니라 같은 이미지를 또 활용할 수 있으므로 이름도 무작위로 변경하여 저장하였습니다.
썸네일 이미지를 따로 만들어 admin 페이지에서 상품목록을 볼때,
user가 상품들이 모여져 있는 페이지에서 활용할 용도로 기능을 추가 했습니다.
admin이 상품의 이미지를 업로드를 하지 않으면 미리 준비해둔 이미지로 대체하는것으로 했습니다.
폴더는 관리자가 상품을 언제 등록했는지 알수 있게 년/월/일로 나누어 폴더를 자동 생성할 수 있게 했습니다.
결과물
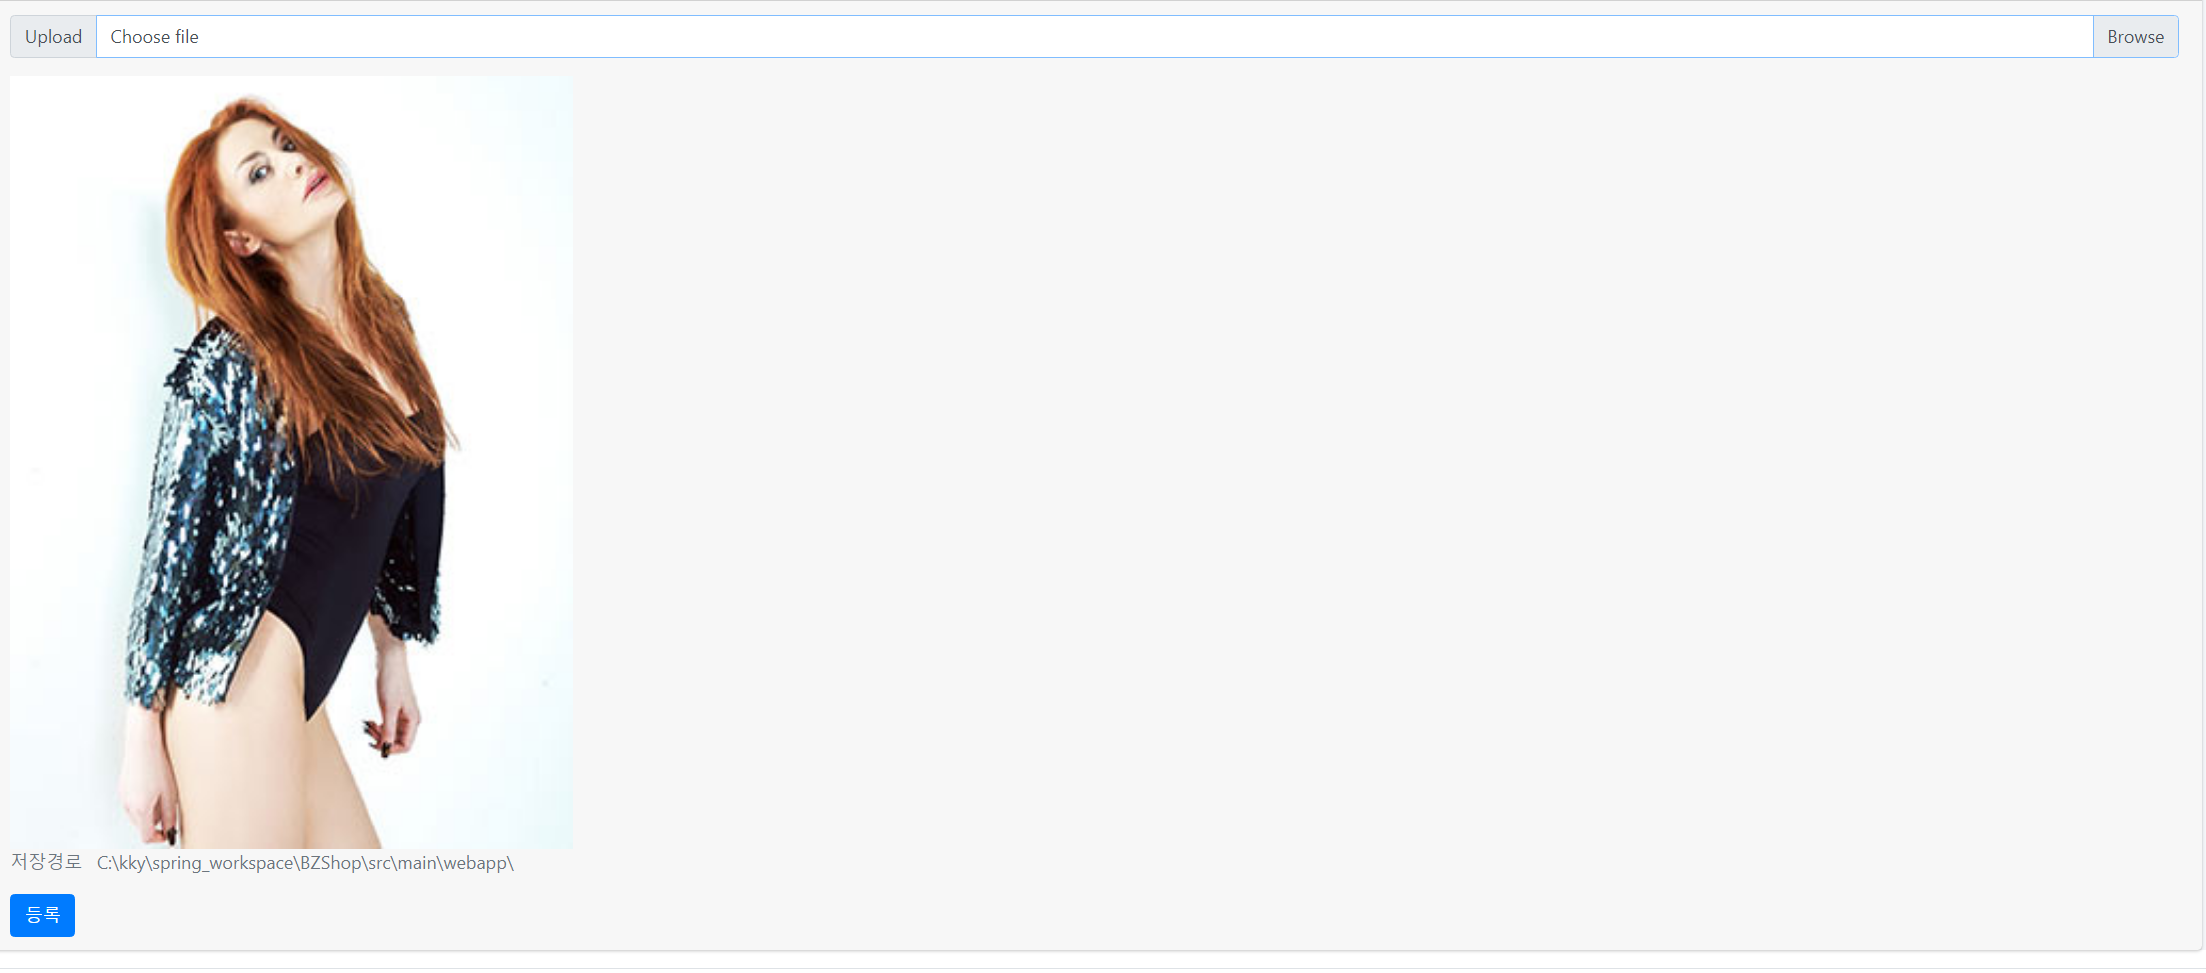

register.jsp
<form action="/admin/goods/goodsRegister" method="post" autocomplete="off" enctype="multipart/form-data">
<div class="card-footer text-muted">
<div class="input-group mb-3">
<div class="input-group-prepend">
<span class="input-group-text" id="inputGroupFileAddon01">Upload</span>
</div>
<div class="custom-file">
<input accept="*" type="file" id="inputGroupFile01" name="file" class="custom-file-input"
aria-describedby="inputGroupFileAddon01" />
<label class="custom-file-label" for="inputGroupFile01">Choose file</label>
</div>
</div>
<div class="select_img">
<img src="" />
</div>
<script>
$("#inputGroupFile01").change(function () {
if (this.files && this.files[0]) {
var reader = new FileReader;
reader.onload = function (data) {
$(".select_img img").attr("src", data.target.result).width(500);
}
reader.readAsDataURL(this.files[0]);
}
});
</script>
<div>
<p>저장경로   <%=request.getRealPath("/") %></p>
</div>
<div>
<button type="submit" id="register_Btn" class="btn btn-primary">등록</button>
</div>
</div>
</form>
AdminController.class
    //상품 등록
	@PostMapping("/goods/goodsRegister")
	public String PostGoodsRegiter(GoodsVO vo,MultipartFile file,HttpServletRequest req)throws Exception{
		logger.info("/admin/goods/goodsRegister controller");

		String uploadPath = req.getSession().getServletContext().getRealPath("/").concat("resources");
		String imgUploadPath = uploadPath + File.separator + "imgUpload";  // 이미지를 업로드할 폴더를 설정 = /uploadPath/imgUpload
		 String ymdPath = UpLoadFileUtils.calcPath(imgUploadPath);  // 위의 폴더를 기준으로 연월일 폴더를 생성
		 String fileName = null;  // 기본 경로와 별개로 작성되는 경로 + 파일이름

		 if(file.getOriginalFilename() != null && !file.getOriginalFilename().equals("")) {
		  // 파일 인풋박스에 첨부된 파일이 없다면(=첨부된 파일이 이름이 없다면)

		  fileName =  UpLoadFileUtils.fileUpload(imgUploadPath, file.getOriginalFilename(), file.getBytes(), ymdPath);

		  // gdsImg에 원본 파일 경로 + 파일명 저장
		  vo.setGdsImg(File.separator + "imgUpload" + ymdPath + File.separator + fileName);
		  // gdsThumbImg에 썸네일 파일 경로 + 썸네일 파일명 저장
		  vo.setGdsThumbImg(File.separator + "imgUpload" + ymdPath + File.separator + "s" + File.separator + "s_" + fileName);

		 } else {  // 첨부된 파일이 없으면
		  fileName = File.separator + "images" + File.separator + "none.jpg";
		  // 미리 준비된 none.png파일을 대신 출력함

		  vo.setGdsImg(fileName);
		  vo.setGdsThumbImg(fileName);
		 }
		 System.out.println("fileName : "+fileName);
		 adminService.register(vo);

		return "redirect:/admin/index";
	}
UpLoadFileUtils.class
package com.blackzapato.demo.utils;

import java.io.File;
import java.text.DecimalFormat;
import java.util.Calendar;
import java.util.UUID;

import org.springframework.util.FileCopyUtils;

import net.coobird.thumbnailator.Thumbnails;

public class UpLoadFileUtils {
	//썸네일 이미지 크기
	static final int THUMB_WIDTH = 300;
	static final int THUMB_HEIGHT = 300;

	//파일 업로드
	public static String fileUpload(String uploadPath, String fileName, byte[] fileData, String ymdPath)
			throws Exception {
		System.out.println("uploadpath : "+uploadPath);
		System.out.println("filename : "+fileName);
		System.out.println("fileData : "+fileData);
		System.out.println("ymdPath : " + ymdPath);
		UUID uid = UUID.randomUUID();

		String newFileName = uid + "_" + fileName;
		String imgPath = uploadPath + ymdPath;

		File target = new File(imgPath, newFileName);
		FileCopyUtils.copy(fileData, target);

		String thumbFileName = "s_" + newFileName;
		File image = new File(imgPath + File.separator + newFileName);

		File thumbnail = new File(imgPath + File.separator + "s" + File.separator + thumbFileName);

		if (image.exists()) {
			thumbnail.getParentFile().mkdirs();
			Thumbnails.of(image).size(THUMB_WIDTH, THUMB_HEIGHT).toFile(thumbnail);
		}
		return newFileName;
	}
	//폴더이름 및 폴더 생성
	public static String calcPath(String uploadPath) {
		Calendar cal = Calendar.getInstance();
		String yearPath = File.separator + cal.get(Calendar.YEAR);
		String monthPath = yearPath + File.separator + new DecimalFormat("00").format(cal.get(Calendar.MONTH) + 1);
		String datePath = monthPath + File.separator + new DecimalFormat("00").format(cal.get(Calendar.DATE));

		makeDir(uploadPath, yearPath, monthPath, datePath);
		makeDir(uploadPath, yearPath, monthPath, datePath + "\\s");

		return datePath;
	}
	//폴더 생성
	private static void makeDir(String uploadPath, String... paths) {

		if (new File(paths[paths.length - 1]).exists()) {
			return;
		}

		for (String path : paths) {
			File dirPath = new File(uploadPath + path);

			if (!dirPath.exists()) {
				dirPath.mkdir();
			}
		}
	}
}
저는 이미지경로가
C:\(사용자)\spring_workspace\BZShop\src\main\webapp\resources\imgUpload\2020\05\05
위와 같은 경로로 생성되었습니다.
+ springboot 에서 이미지경로 설정
2020/03/24 - [spring boot] - [ckeditor] spring boot + jsp에 글쓰기 플러그인 적용(이미지경로 설정)
[ckeditor] spring boot + jsp에 글쓰기 플러그인 적용(이미지경로 설정)
지금 하는 프로젝트에 위지윅 에디터를 적용할 생각입니다. 적용하는 부분은 쉬웠지만 이미지 경로 때문에 며칠을 날려버렸습니다. 원래는 이미지 파일을 이클립스 외부에 저장하고 가져올 생�
badstorage.tistory.com
+ 도움이 된 블로그
https://kuzuro.blogspot.com/2018/10/11.html
스프링 쇼핑몰 만들기 #11. 상품 이미지 첨부 기능 구현
개발자, 웹개발, PC앱개발, Java, C#, HTML/CSS, JavaScript, Spring, ASP, .NET
kuzuro.blogspot.com
spring + oracle 개발환경으로 하실분들은 보고 따라하시면 될겁니다.